This is the story of how I transformed one little window in our house from boring to awesome! From less than private to very private! From letting the sun in to...still letting the sun in!! Here it is before, oh so boring...

And then, AWESOME!

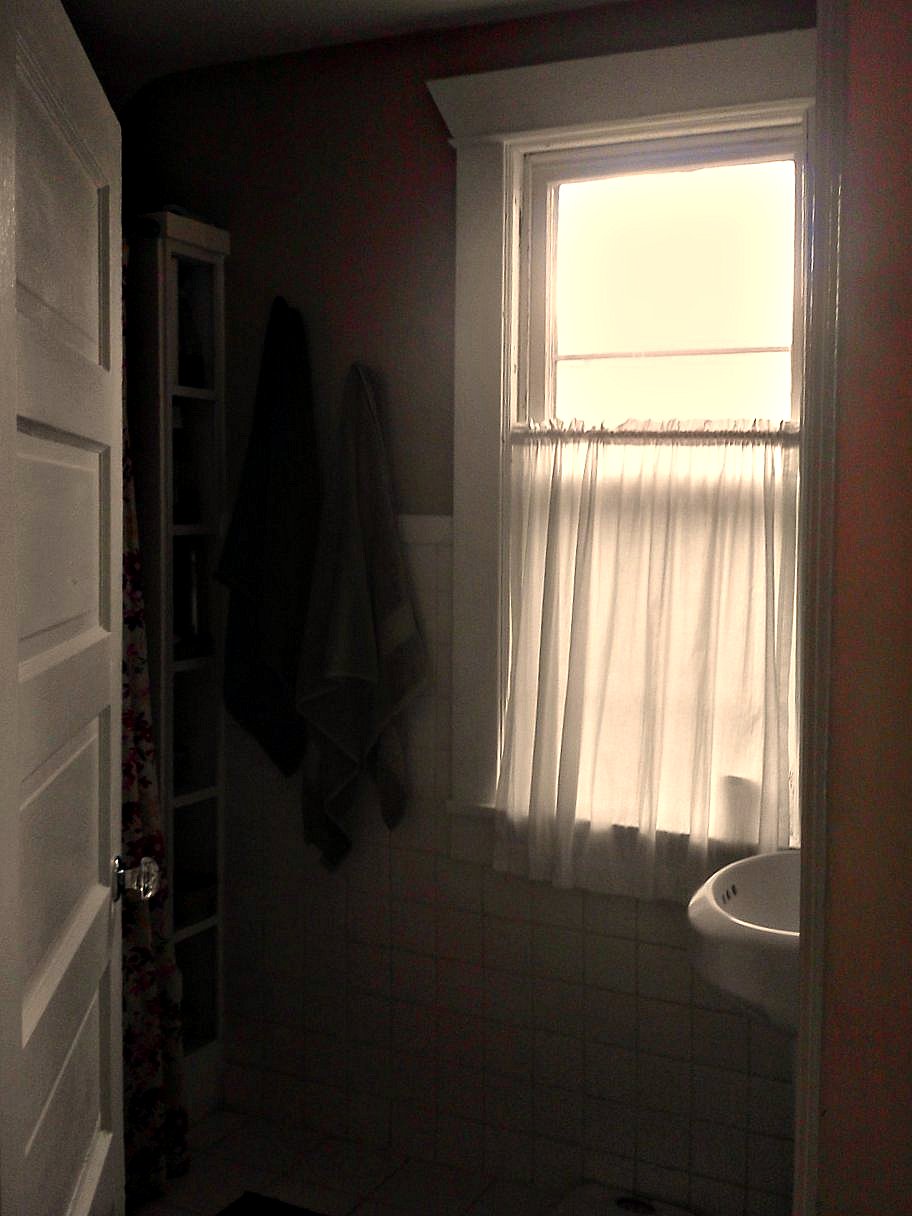
Okay, lets back up a bit. What I really want to do is frost the window in our upstairs bathroom. I want lots of light, but I also want, let us just be honest, I NEED to be able to stand naked in this room and not have the world see it. (Or just the neighbors, but that can feel like the world.) These two photos are the best I have to offer, regarding the window in question. You get the point, eh?

However, I had never frosted a window before, so I needed to try it out in a place where a little extra privacy would be nice but also was not in a place where I would have to confront every day if things went horribly array. On that note we travel from the upstairs bathroom all the way down to the basement stairwell. This area is a mess, so be warned. The plaster needs to be repaired, the walls are painted a grotesque yellow-cream, aka smoker white, the tile on the floor is old and dingy the shelves and ad-hoc at best, etc etc. In all honesty, this is the sort of space someone in their right mind does not let anyone on the "outside" see. And yet, we leave this area on display. In the end, it is just a matter of practicality...we store food in this space. Someday...oh someday...


I knew I wanted something a little more visual than just straight up frost so I cut squares which I would turn 90 degrees for the diamond effect. Over the course of many episodes of Mater Chef I cut out a million of these squares. Obviously, the cat was very involved. She always is.

Then I created a work station. This job requires the following....

If you take on this project, know that there are all sorts of paper types for this kind DIY. Read the instructions for application, it's your best bet. And make sure the window is VERY clean.

I used an exacto knife and sciccors as part of my measurement process as I went along. Every singe pice required trimming of some sort or another. When you have the shape you need. Peel. Smooth out the paper on the window with your MPR card (or equivalent) as go. Take a sip of your Arnie Palemer. And repeat.

Then stand back and admire your work. Watch the world disappear before your eyes. And continue on.

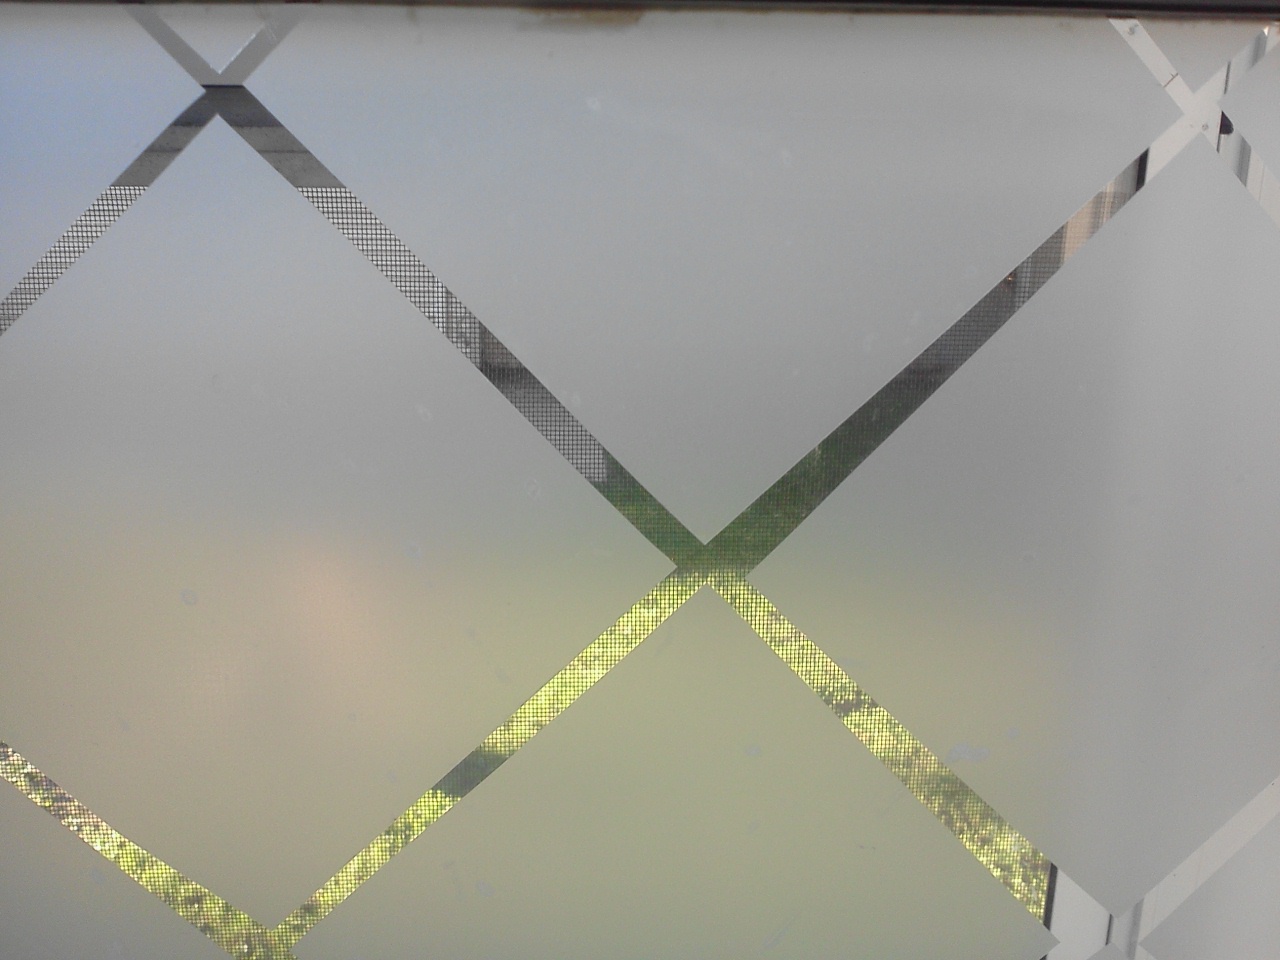
Do not be fooled. This project takes hours, it is tedious. And up close, it will look less than perfect. After all was said and done, I felt kinda bummed about all the bubbles in the paper. All I could see were the bubbles. I felt relieved that I had chosen to test out the project down in the stair well and did not go straight for the bathroom window.

But then, a miracle happened. The bubbles started to move out of the paper...two weeks later, that same bubbly mess above looked like this... I still do not really understand it. Maybe it is the type of paper I used, but now it looks great and mostly bubble free.
The light comes in nice and bright still, but I do not have to see the neighbors house, and they can't see in. Happiness ensues.
Now, I just have to deiced: Do I want the same pattern in the bathroom? Or maybe I should try something else entirely. Like this perhaps? As always, I am open to suggestions.
Super Cute Amber! I love it.
ReplyDeleteThanks, Emak. I love you.
ReplyDelete