Showing posts with label DIY. Show all posts

Friday, July 13, 2012

Frost on the Windows

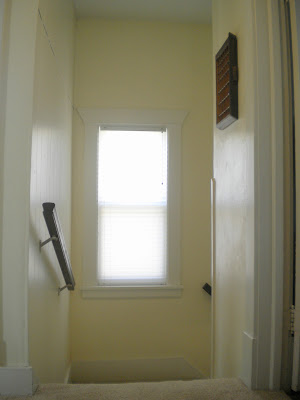
This is the story of how I transformed one little window in our house from boring to awesome! From less than private to very private! From letting the sun in to...still letting the sun in!! Here it is before, oh so boring...


And then, AWESOME!


Okay, lets back up a bit. What I really want to do is frost the window in our upstairs bathroom. I want lots of light, but I also want, let us just be honest, I NEED to be able to stand naked in this room and not have the world see it. (Or just the neighbors, but that can feel like the world.) These two photos are the best I have to offer, regarding the window in question. You get the point, eh?


However, I had never frosted a window before, so I needed to try it out in a place where a little extra privacy would be nice but also was not in a place where I would have to confront every day if things went horribly array. On that note we travel from the upstairs bathroom all the way down to the basement stairwell. This area is a mess, so be warned. The plaster needs to be repaired, the walls are painted a grotesque yellow-cream, aka smoker white, the tile on the floor is old and dingy the shelves and ad-hoc at best, etc etc. In all honesty, this is the sort of space someone in their right mind does not let anyone on the "outside" see. And yet, we leave this area on display. In the end, it is just a matter of practicality...we store food in this space. Someday...oh someday... 


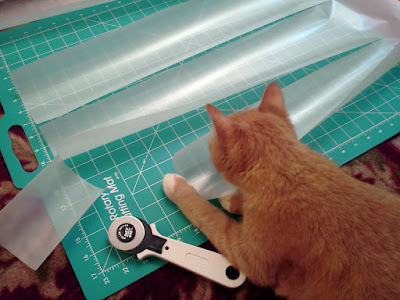
I knew I wanted something a little more visual than just straight up frost so I cut squares which I would turn  90 degrees for the diamond effect. Over the course of many episodes of Mater Chef I cut out a million of these squares. Obviously, the cat was very involved. She always is.


Then I created a work station. This job requires the following....


If you take on this project, know that there are all sorts of paper types for this kind DIY. Read the instructions for application, it's your best bet. And make sure the window is VERY clean. 


I used an exacto knife and sciccors as part of my measurement process as I went along. Every singe pice required trimming of some sort or another. When you have the shape you need. Peel. Smooth out the paper on the window with your MPR card (or equivalent) as go. Take a sip of your Arnie Palemer. And repeat.


Then stand back and admire your work. Watch the world disappear before your eyes. And continue on. 


Do not be fooled. This project takes hours, it is tedious. And up close, it will look less than perfect. After all was said and done, I felt kinda bummed about all the bubbles in the paper. All I could see were the bubbles. I felt relieved that I had chosen to test out the project down in the stair well and did not go straight for the bathroom window.


But then, a miracle happened. The bubbles started to move out of the paper...two weeks later, that same bubbly mess above looked like this... I still do not really understand it. Maybe it is the type of paper I used, but now it looks great and mostly bubble free.


The light comes in nice and bright still, but I do not have to see the neighbors house, and they can't see in. Happiness ensues. 


Now, I just have to deiced: Do I want the same pattern in the bathroom? Or maybe I should try something else entirely. Like this perhaps? As always, I am open to suggestions. 

Tuesday, May 1, 2012

Power Tools and Never Ending Home Tweaks

I bought a power tool. My first one. Technically, I suppose it is "our" power tool, but I have a feeling that I will be using it more than the hubby will. Are you just dying to know what it is?? Okay, I know you can already see the photo below so I won't try to keep you in suspense. It's a circular sander!


Ain't she cute?? Funny thing is, I have been wanting this little lady for quite some time but I had this idea in my head that since it was a power tool it would be expensive. Not so!! This little cutie was less than $30 and it came with a $7 rebate. So in the end she cost less than we spend on coffee every week.

I have a slew of projects in mind where my new circular sander will play a role, front and center, but before I chew off anything too big I thought it would be smart to use her on a smaller project. So, remember this scene??


We all recall what a big improvement this is compared to what it was before...


But still, the number of different wood finishes in this small space felt chaotic. There are two different frames, the white around the window, the dark mahogany of the banister (we stained that last year), and that little table. I love that little corner table, for one, my Papaw made it (that is southern speak for Grandpa) but it also is made of about 8 different woods, which is awesome but as it turns out, not for this space. So we need to make some adjustments to the landing.


This new arrangement, sans table full of stuff, felt a millions times better to me immediately. But then of course as we lived with the adjustment, I felt like there was one more thing I could change. That's when I decided to try out my new sander. See, it's all coming together, sometimes it just takes a little while.

I have gruelingly sanded objects much bigger than this in that past by hand. It was actually shocking how easy this was. Hold the sander over the surface and the finish is removed. No sweat involved. First I sanded the top, then the outer edges and then the inner edges. All in all, this probably took me less than 30 minutes.


Once the sanding was all done and the frame wiped down I needed something to go in the frame that would allow me to spray paint it with out gumming up the slits and grooves that hold everything in place. The obvious choice was using the cardboard that came in the frame. So I went with the obvious choice.


I taped it in place so it wouldn't get all leaky...


And then I applied two coats of primer, two coats of a flat white and finally a coat of clear glossy stuff to make it look all nice and finished.


The entire project was complete in a afternoon. And the end result...well, I think it even makes the poster pop a bit more.


I am quite satisfied...for now anyway...


Please tell, do you have a story about a little tweak that made a big difference? 

Thursday, April 19, 2012

Building Your Stake

One of our projects for this spring has been to build a third garden bed. Our 2, 4x6 beds, gave us a nice amount of food last year, that is, it gave us enough to eat, but not really much for saving so we decided to expand a bit.  I wanted to grow a few additional items, in hopes of being able to save some food for freezing and canning. So until the weekend before last this is what our "garden" looked like.


But then my handy man husband went out and picked up 4 10 ft 2x8's and got to work cutting the lumber to make a third bed that would run perpendicular to the other two and would be 11 feet long and 2 feet wide. Why these weird proportions you ask? There is a reason! This part of our yard is the only area that isn't covered by the tree's shade for a large portion of the day. If we made it any wider than 2 feet it probably wouldn't get any sun.  Basically, we are utilizing the last of the good vegetable gardening real estate we have.


After cutting the pieces to size Chris anchored them together with 2 L brackets in each corner.


And then he reinforced that by putting a few screws on the outside of the corners. I stood by and shouted words of encouragement like, "nice biceps!" 


Ta-da! That was probably the easier part. And the total cost, $26! Not bad, not bad at all!!

Next up, the soil needed to be removed and then the box needed to be filled with a happy and  healthy compost and soil mixture.


As fun as that part was (for Chris), I failed to take any photos, so now we are now going to move on to the next task. Which is to stake out the beds in preparation for sowing seeds. I have two options for you. We will call them year one option and year two option. Either way it helps to draw little ticks marks along the edges of your bed at 1 foot intervals so you can stake away later without having to measure as you go.

Year one option is to break up scraps of wood and tie strings around them, like so...


The nice thing about year one option is that when you are ready to take them out of the beds you can wrap them up and store them away to reuse next year. This made for fairly quick work this year since they were all already made, but it was not so quick last year. The one thing I don't like is that these guys can be kinda hard to get to stay in place as there really is nothing holding them down. But they do the job, no question there.


Year two option is my new favorite option because it was quick and easy work. I tied a loose loop with my string and laid the not knotted part over my tick mark, like so...


Then I used my handy little staple gun and told that string who was boss by stapling it into place.  


Sinch the knot around the staple...


Then pull the string taught to the opposite side of the bed and staple it down. If you get the staple fully into the wood it is surprisingly secure and you won't have to worry about it going anywhere.


The end result is three beds all staked and ready to be sown with seeds and plants. Year two option, which I used on the new bed, actually hovers above the dirt instead of sitting on it. I don't think this is better or worse, but one or the other might cater to an individuals preference. Also, it just looks a lot cleaner. 


This past Sunday I even sowed some seeds, from left to right we have two square feet each of Kale, Spinach,  Lettuce & Mesclun Greens. The Mesclun greens are new this year and replaced the Swiss Chard from last year. Turns out, I wasn't as into Swiss Chard as I thought I would be. No loss though!


Oh, and out in the front yard, we have the first sign of life sprouting up near our bean pole. I planted some seeds out there weeks ago but with the cold snap nothing ever happened. I guess they were just waiting till now to do their thing. (Disclaimer - this photo is from last summer - perhaps you already realized that since there are no day lilies planted at the curb side).


So, have you planted anything out doors yet? Is anything starting to pop up? Or did you do that weeks ago and already begun to harvest your first bits of food??

Tuesday, April 17, 2012

Walk This Way

I present to you another post in which we take advantage of something free to give our little plot of earth some much needed character all while adding functionality. Last May, as our neighbors were cleaning out their house in an effort to sell it, we acquired A LOT of miscellaneous items, like the little shelf I told you about a few weeks ago. Sitting in their garage, intended from some project that never happened, was a pile of red paver stones with a floral pattern cut into them. I like the way they looked and they were free, so we took them and let them sit in our garage for a while before we figured out where we wanted them to permanently reside.

As you can see from the photo above, the garden hose resides on the side of our house. And since most of the stuff that needs to be watered is in the back yard, we do a lot of walking back and forth in that area where I drew "X"'s. See where I am going here?? It really was a no-brainer.

We laid the stones out and walked back and forth on them to make sure there were positioned at a comfortable stride. Then Chris put on his work gloves and started digging. He used the screwdriver method -- trace around the object in question with a screw driver -- so that he would dig only the area where the stone would eventually reside. 


If you look real close in the photo above you can see the outline in the ground where Chris traced around the stone. Trace. Dig. Repeat. x9.

In case you are curious we did not put weed block paper underneath. Additionally, we have yet to fill in the stones with anything. I debated if we should put pebbles in as to keep the maintenance level down, or if we wanted to fill them in with dirt. This internal debate has since turned into procrastination. And the stones have filled up with all sorts of random yard debris, such a leaves. It's not so pretty. So that will need to be addressed in the near future. My thought now is that we will fill them with dirt and in time if grass happens to grow in them we can just weed whip them to keep it clean. And it will created a little bit of a secret garden feel to it like the photo below which happens to be from the DIY Network's tutorial on building a stone walkway...if you are interested in such information.


The cost on this project was just a little bit of sweat and we are very happy with the end result. The stones add so much character and functionality.


Friday, April 13, 2012

Friday Walkabout

Since I have gardening on the mind, I thought I would take you for a walkabout through our yard and show you some of the improvements we did last year and of course point out the things I would like to do this year.

Let's start out front. You saw the house the other day from this angle. What you don't see in this picture is that where the grass ends in the photo, the yard suddenly slopes downward. We plan to put in a retaining wall there, hopefully sometime this summer. (I happen to know that it is number one on This Earths to do list, so that is pretty promising.)


If you are standing on the other side of the front of the house, and its not such a gray day, it looks like this. The other HUGE project I would love to do, this year, is paint the outside of the house, the stucco part of the house. I am thinking yellow, because it would contrast nice with the brown shingles on the top of the house a give it a nice pop. Just about anything would be better than patchy-tan stucco.

Along the side of the house and wrapping around the front is one long garden bed. It might be more appropriate to call this a "mulched area". When we moved there were two Goldflame Spirea shrubs (see above) in front of the house and along the side was an uncontrolled area of lily of the valley, some ferns that volunteered from the neighbors yard and a ton of milkweed (see below). We cleaned this all up last spring and planted orange and yellow lilies, purple iris, coral bell, a peony bushy, some ground cover I don't know of the name of, a few succulents and at least one other flowering plant that I am blanking on now. All of this came from my mother's yard before she sold her house.  Thanks mom!!

Before:

After:
                                

And if we keep on walking on to the back yard, through the side gate, we have another bed that was cleaned up last year. It too was over run with lily of the valley (my arch-nemesis). We planted a lot of the same stuff here that we planted out front plus some hosta's, fountain grasses and a rasberry bush from the neighbors yard.

Before:


 And after


Let's pull back a little though and give you the long shot. Which includes the two 4x6 garden beds we built last spring.


In the above photo you see the sidewalk of to the left, that's where we are headed next. This bed was already here when we moved in. Yay! The side in the lower part of the photo is our strawberry patch. The other side is a herb garden that I planted last year and plan to do again this year. Over in the corner is our Rhubarb. Oh, and see that gutter hanging out in the middle of the sidewalk. I HATE that thing. I am hoping to put a rain barrel there and remove that so no one trips over it and dies.


If we pull back from here, you can see the whole of the back yard near the house that we have been talking about. I can't wait for an after picture with the house painted.


The perimeter and the far side and the back of yard are also lined with a garden bed/mulched area, it's about 2 feet deep. (That little line in the image below is meant to help you understand what I am taking about because I don't have any close ups for you). This where our two peony bushes are. And some Purple Clematis which is growing on that white trellis-y thing. The Clematis did not survive the fence building project  of 2011 but is already starting to come back this year. Fingers crossed. We put in lilies, coral bell, ground cover and a few other items last spring. I also planted tulips along this perimeter in the fall. They are coming up now but no actual flowers have bloomed as of today.


And so our walkabout comes to an end with a final photo of the last garden bed in the back corner of the yard. There are lots of hosta's back there and some other green stuff. It's a dark little corner so the colorful plants aren't so happy back yonder, but it's nice still. And how about that tree?? Two of me can not wrap my arms around it. We think she is older than our house. She provides lots of shade, especially in the back part of our yard which we love.


Now, if you are still reading, it's time for a little game. In the back corner garden is a little bird bath. You can hardly make it out in this picture, but it's there, I promise. And it's in a few other places through out this post too. Can you guess how many spots we put that bird bath in before it ended up there? I'll tell you this, it was in more places that you find in this here walkabout.

You can expect a lot more posts about the yard in the coming months, here is a little list of projects I hope to get done this year:

  • -Add a two tiered retaining wall to the front yard to correct slope
  • -Plant lots of flowers in the new bed of the retaining wall
  • -Paint the exterior of the house - yellow??
  • -Fix gutter to flow into rain barrel
  • -Add trellis over the back gate
  • -Add third garden bed
  • -Plant more flowers