Thursday, March 29, 2012

Little Shelf

When our neighbors sold their house last summer, we ended up with boxes of random sh*t. One of them was this little shelf. I held on to it because of it's size. But it wasn't much to look at, so it sat in our basement, until a few weeks ago. 
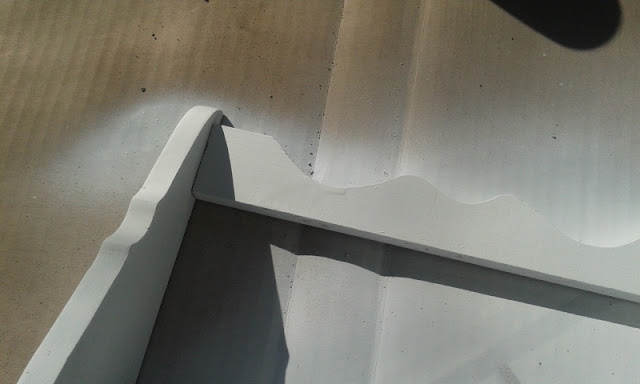
I decided to give it a little face lift, so that I would actually want to put it on display somewhere in the house. I covered it in two coats of white primer, and then gave it a coat of white spray paint.
The only problem was that, not having used spray paint much before I bought a flat white (as opposed to matte of gloss) after putting it on the shelf I really didn't like the look of it much. You don't really get the feel of it here, but flat paint has a bit of a rough, dry look and feel to it. I wanted a more polished look.
The good news is, you can buy a clear spray polish to go over just about anything at your local craft store and that does the trick real well. Then last weekend while I was in the office/sewing /imagination station room ironing a few items, it occurred to me that it would be helpful to have my little shelf around to set my iron on when I wasn't using it. We put to little hooks on the back, I pounded some nails into this book shelf my father built for me in the 5th grade and ta-da!
I have no idea why half this picture looks all soft and fuzzy and the other half looks normal, in real life it all looks normal. You should come over and check it out. And below is a blurry before photo I happened to have around which I only share so you can understand where the ironing hangs out. 
Yeah, that is a cat up to no good. 
Oh, it is so helpful!
It always feels good using what you have to make your space a little more functional. Even tiny tweaks get me excited, as you can see!!

Tuesday, March 27, 2012

Update on Seedlings - Day 11

Just stopping in to provide a little update on the seedlings, I know you are dying to hear how their first 11 days have been. 

TOMATOES: As I suspected, the tomatoes are coming in strong and are leading in the height category. Tomatoes grow faster at the get-go than anything else I have ever planted. One of the many reasons they are so awesome. I have three types of tomatoes going right now, and none of them seem to be any better off than the others. Sadly a few of the tomato plants were brutally ripped out of the soil by an over sized beast named Luna, she is now suffering a quarantine from the seed babies. 

JALAPENOS:  Since this is my first year with the Jalapeno’s I didn’t know what to expect, but almost all of them have already popped up. And they are adorable. I love them so much and am looking forward to eating many many of their offspring.

RED ONION: Funny/Annoying/Unfortunate thing, in my last post on the subject I remarked that I did not have a great time growing onions last year. In fact, I never even transplanted them. I seeded them again this year, same packet of seeds even, to see if I would have better luck.

Well, I read this week that growing onions from seed is REALLY DIFFICULT.  The best advice seems to be starting onions from sets and not seed, until you get a few strong years in, and then if you are dying to grow them from seeds, try again. I am not sure just yet how I will deal with this. It’s still early enough to consider multiple options. Perhaps I will be back later with a post solely dedicated to ‘The Onion’. Perhaps not.


BELL PEPPERS: I am just starting to see the first bit of life from the bell peppers. I am hopeful that this years addition of a grow light will give them a leg up from last year. Don’t worry, I’ll let you know.


MARIGOLDS: Only two seedlings have sprouted. And they don’t look super happy. I am not too worried about this, as they were free seeds. And growing plants from seeds isn't my passion. Additionally, I think I am having “self-watering” issues on this side of the tray—due to a disintegrating water 
mat—but have been supplementing with a spray bottle, which is good practice anyway. Time will tell.

LAVENDER: Nada. As in, did I plant those, or was that a dream?? Maybe next week.

I still have three empty rows on the tray open and begging for seeds. Last year, I started my cucumbers indoors, even though the packaging said I could direct sow, and I think I will perhaps do this again.  Why not give a head start, right?

Additionally, I just read last night in John Seymour's The Self-Sufficient Gardener (Shout out to Gackles for the recommendation!) t
hat Brussels sprouts do well from transplanting and have increased flavor when they experience a frost or two. (This frost business is also true for Kale). So I think I will start those now as well.

I could go on, but I think I will leave it there for now and hit you up again later with more seedling chatter.

Monday, March 26, 2012

Stairwell Revealed!

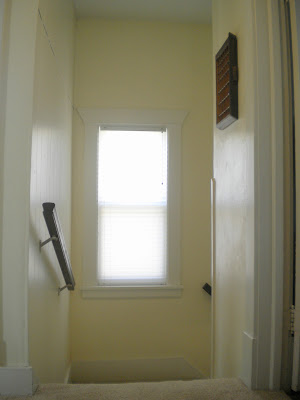
Remember back here when I told you I had plans for the other side of my boring stairwell?? Well, I am back, with photos, for the big reveal. In case you forgot, this is what we have been looking at for the last fifteen months since we moved in.  
One more before photo from the hallway upstairs. So boring!
It wasn't much to look at. But now!! Well, I think it's a bit better, don't you? (Unfortunately these after photos aren't totally spectacular, but you get the idea.)
This is how it went. I saw this picture on Design Sponge:

I love the way the curtain swoops off the to the side, it's soft yet pops and it allows a ton of light to come in which is a must. Doesn't it add so much to the window?  Along with that image is a really great tutorial on sewing a curtain of this style, make sure to check it out!

I found my fabric at Hancock on sale for $5 a yard! I bought two yards so all it cost me was $10 and a few hours of time. Luna made sure to get in on the action, per usual.
The most "exciting" part of this process was when my tie back I had just sewn caught on fire. Yeah....
Once that drama was over. I painted. I immediately loved the blue gray wall with the dark stain I put on the handrails.
We actually had this paint in our basement already. It was left over from the previous owner, and it is the color of our bedroom. Which ties to to the spaces together quite nicely. See?
With the curtains made and the wall painted, all that was left to be done was to hang my location love posters that I got from Ork Posters

Here is a nice action shot of the man of the house!
Before:
After:
Before:
After:
There is still some tweaking to be done here. I plan to paint the frame for the Chicago Poster white to match the St. Paul Poster frame. And I'm not sure if the shelf will stay or get replaced with something else, or maybe I will cover it with something, as I am not digging all the different woods going on. But for now, I am very happy with the overall improvement. 

Oh and my favorite little bit. This red button I used for the sash. It's a subtle but awesome little pop. 
In other news, I am working on a house tour for those of you who are not acquainted with the layout of our place. It may be a while, but it will eventually show up! Thanks for stopping by!

Friday, March 23, 2012

Resources on Gardening

Last year, before I started my first real garden I won a $100 gift card for Borders. They may have gone out of business a few months later, but not before I managed to pick up a few books on gardening. I didn't do any research on the books themselves, but instead sat on the floor, cross-compared and made my best guess. I have found them to be helpful to varying degrees, and unhelpful in different ways. So, if you are looking to buy a gardening book, or check one out from the library (it's important to support Libraries, dear friends) I thought I would throw my two cents in, on three of the options you will find out there.

And if you don't go to books anymore, because you have Google, I say this not just because I have an MLIS degree, but really and truly, nine times out of ten, if you are researching something your information is going to be more reliable, tested and worth the extra effort, from a book.  I really believe that. Not that I am anti-Google, I love the bejezus out of that handy little search engine and all it encompasses. The point here is only this: don't over look books!

On to the subject at hand. Currently, I am impatiently watching the first garlic I have ever planted grow. So for this post my examples will all be founded in garlic. Sweet, pungent, makes everything taste better, garlic!


My favorite of the books I bought last year, is Carol Klein's "Grow Your Own Vegetables". If you are looking for a single book to start with, this is the one to go to. Or at least, its the one I go to.


It starts with a briefish - 55 pages - on getting started with gardening and has lots of great tips to bring you all the way through to harvest and even preparing your garden bed to "over-winter". It's quick, concise and filled with pictures, but most importantly it's informative. The vegetable section has between two to four pages each for most everything you are going to grow in your backyard, broken down into helpful family-groupings. In the instance of Garlic, which is grouped with Leeks, Onions and Shallots, you have a full page dedicated to general information about garlic, what kind is best to plant, suggested types to start with, different types and which regions they are best suited for. And then two more page of information pertinent to your gardening experience: 
  • Where to Grow
  • Planting tips
  • Caring for the crop
  • Harvest 
  • Storing and Cooking Tips
  • Pests and disease information
My favorite thing about this book is that it is so visual. In the top corner for each vegetable you see the veggie in its seed form, plus a plethora of of other pictures at various stages in the planting/growing/harvesting process. For the visual learner, it's really incredible. The one down side to this book,  is that while she does offer up tips for gardening in colder or warmer weather, she isn't specific to zones or regions. 

But, I don't rely on that book alone. I also love James A Fizzell's "Guide to Minnesota Vegetable Gardening". Having a book that speaks specifically to your growing area is really invaluable. It's kinda like having insider information. It's filled with great information about the history of gardening the Midwest, and it even has helpful charts about precipitation and freeze and frost dates through out the state, not to mention important numbers for local resources. 


Like Klein's book The Guide to Minnesota Vegetable Gardening breaks into sections everything you are going to want to grow - but it does so alphabetically. Which makes it a bit easier to navigate. It also has a pretty impressive section on Fruits, which does not exist in Klein's book. There are however, no pictures in this book. Where it lacks in imagery though, it makes up for in content. The Garlic (Alum Sativum) section starts with a bit of history, just as the other book, although much more precise, and then has the following sections:
  • When to plant
  • Where to plant
  • How to plant
  • Care & Maintenance
  • Additional Information
There are helpful charts through out the book on various varieties of your veggies and fruits. If you use this book to help figure out what you want to plant in your garden, be prepared to have to pair down your list -- a few times over. 

Just a heads up for you non-Minnesotan's out there, this series does exist for all 50 states. I can't speak to how well they are written in comparison to the Minnesota variety, but the point really is to find a book specific to your state or region. 

Finally, we come to the third book I purchased last year. "The Everything Grow Your Own Vegetables Book" by Catherine Abbott.  Honestly, this book is surprisingly unhelpful, so I am not going to spend a lot of time going on about it. 

Here is the quick and dirty version: It seems like it has a lot of information, but there is no detail.  Here is what it says on Garlic, "Choose the biggest cloves to plant and mulch the beds after they are planted." Really? How do you plant them? (Because that matters with garlic!) And how far apart? And when? And how deep? I suppose as a supplement to all the other things you have read, it doesn't hurt to take a look if you already bought it...but if you haven't bought it...I might try something else. And then, if I were you, I would come back and tell me if I should pick it up too!


So, there you have it. Two books to pick up, one to not waste your time on.

Do you have a gardening book(s) you love, and find extremely helpful?? I would love to hear about it!!

Wednesday, March 21, 2012

Sweet Sack Giveaway!

That's right! You heard me! Luminous is offering up it's first ever give away!

Last night, I was looking at this ugly little pile of clothes line clips that have been hanging around the house. And I thought, "Well shoot, there is no need for this!" 


I decided, why not make a sweet little sack to hold them in. Something colorful that will pop in the back yard. And I'm going to make one for one of y'all as well.


See how nicely she does her job of holding these clips, while looking so inconspicuously cute?


Really, she could hold all sorts of stuff. You could put her in your purse and have her hold the items that you always losing. Or keep her in the car for a little discretion from passersby's. The options are endless (kinda)!

But, in case you would rather make one of these for yourself instead of trying to win one, this is how I made it.

I took a fat-quarter, folded it twice:


Then cut it in half:


Flipped it inside out:

Photo

I made a mark where I wanted to leave hole so I could string a cord through to tie the bag:

Make sense?


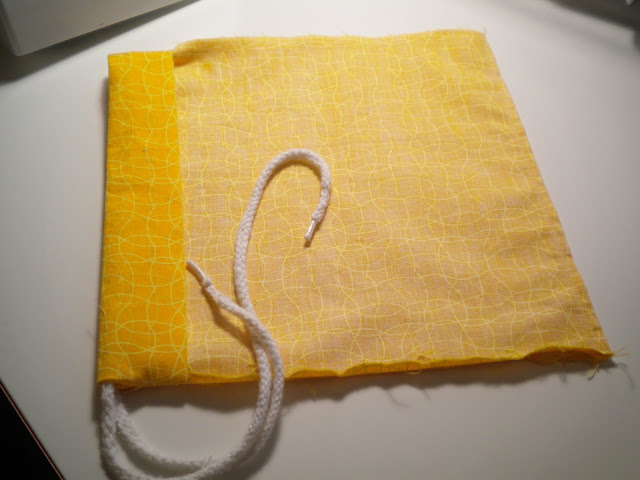
Sew along one side, across the bottom (where the fabric is folded) and up the other side. Leave the top/4th side unsewn. Once you reach the bottom mark on your fabric, back stitch, pull out the needle and sew forward and back at the top of that edge. When you are done, it will look like this:


Press out the seam on the side with the opening. At the opening itself, press out as much as the fabric will give: 


Fold the top of the bag towards the wrong side of the fabric, till you get this sweet little heart shaped opening. (Seriously, this little lady is just asking for some love!)


Press:


You have the option of looping your chord under the fold now, or waiting until you finish sewing. I did it at this point because I find it so tedious after it's been sewn shut:


You just have to give a little extra attention when you are sewing this next part that you don't catch the cord, but it's no biggie really:


Sew along the bottom edge:


It happens, don't feel bad. Check your threading and get back to business.


Cut off any hanging thread:


Check for any problems with your stitching, and then fold right side out:


Ta-da!! (Questions? Just ask!)


So here are the giveaway details:
The PRIZE: The same sack made with this lovely green fabric.


TO ENTER: Comment on this post and tell me what you would use this sweet little sack for.
GIVEAWAY CLOSES: Thursday, March 22st at Midnight.
OTHER STUFF: One entry per e-mail address is permitted. The winner will be selected using random.org and announced on Friday as an update to this post. That’s right, come right back here on Friday for the announcement of our winner. Good luck…
The giveaway is over! Congratulations to TomFool!!